The SuperFOIL Spacer is our newest installation tool and was specifically designed to help make the process of installing SuperFOIL Insulation easier than ever before. But, great tools are only useful if you know how to use them!
So, if you’re hoping to use SuperFOIL Spacers in your next insulation project, this quick guide will walk you through the process of installing them properly.
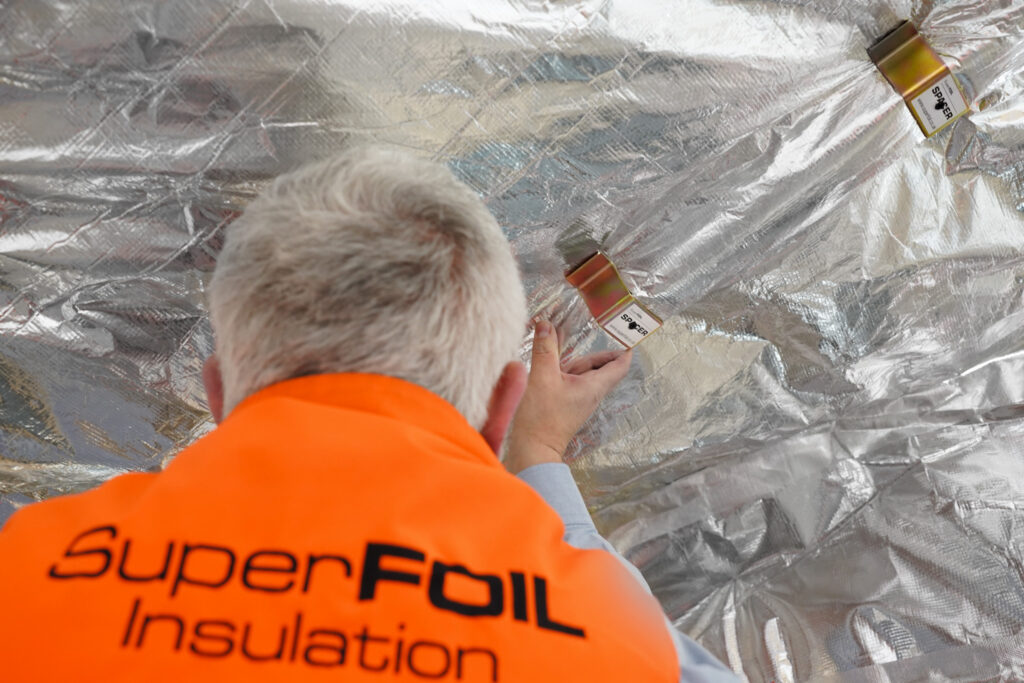
Step 1: Spacing Your Spacers
One of the most important things to keep in mind when using our SuperFOIL Spacers is… Spacing. To be more specific, the spacing between your spacers themselves.
You see, one of the things that helps SuperFOIL Insulation to really shine in comparison to more traditional insulation alternatives is it’s flexible nature, which allows it to be installed as a continuous layer of protection leaving absolutely zero breaks in your insulation coverage. However, this flexibility also makes it super important that you fix it in place at appropriate intervals, so that you can ensure the best performance possible.
So, when you’re using your SuperFOIL Spacers, it’s essential that you make sure the distance between each of your spacers (along the same timber frame) is no more than 300mm. If you do that, then the spacer itself will take care of the rest, providing top quality installations every time!
We want to be sure that you get the absolute most out of our products, which is why we make a point of providing expert guidance on how to get the most out of our products when you install them, and how to avoid running into issues.
So, if you are planning a SuperFOIL project, please make sure to visit our application pages on the SuperFOIL website, and download one of our expert installation guides. These are written to cover everything you need to know for any SuperFOIL insulation project, whether you’re insulating an external wall, a flat roof, or even a room-in-roof loft!
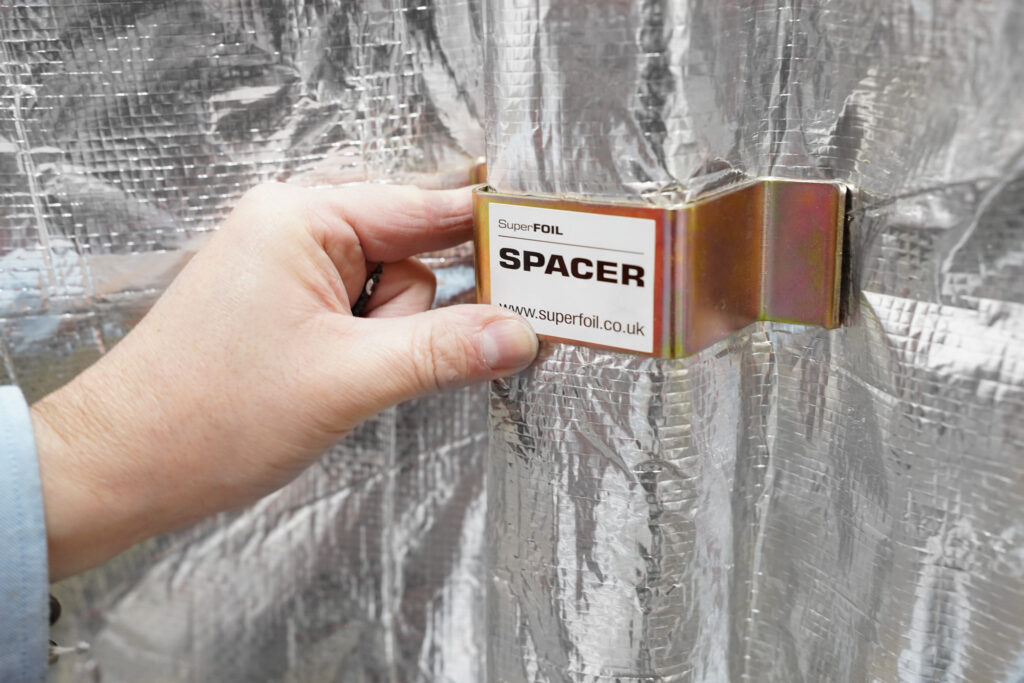
Step 2: Slot Your Spacer in Place
Once you’re confident that you’ve got the spacing of your spacers in hand, the next step is to slot the spacer in place.
The spacers are designed to make this process as simple as possible, so all you need to do is slot them around the timber frame or rafter, over the top of your insulation, and press it down firmly.
The SuperFOIL should compress beneath the spacer. So, while you shouldn’t have to push too hard, be sure to keep some firm pressure on the spacer once you’ve got it in place.
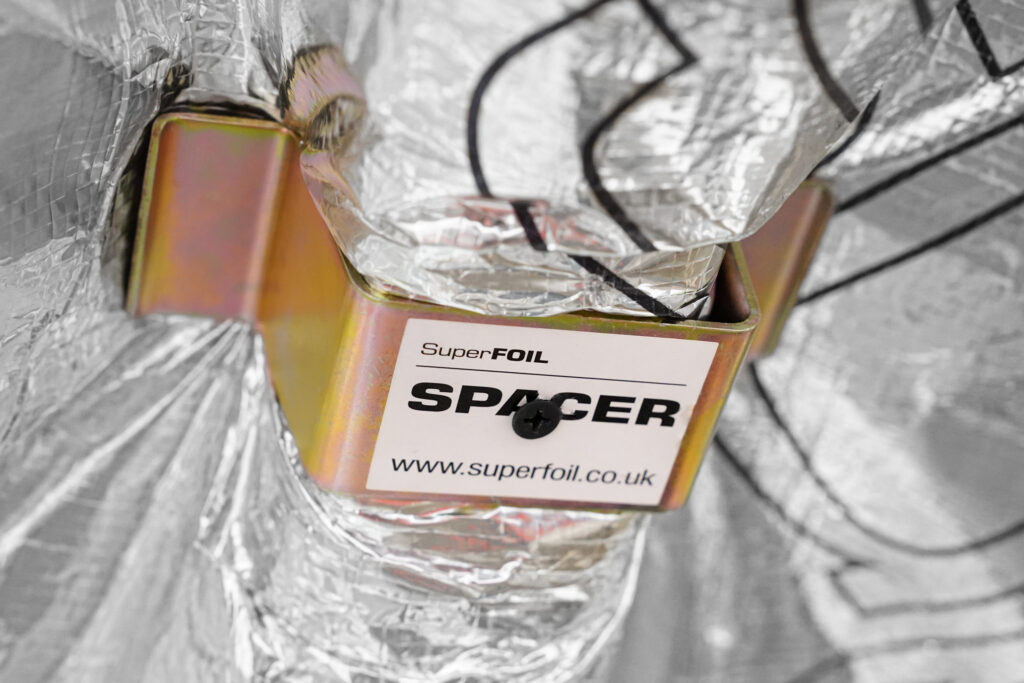
Step 3: Screw It In
Finally, fix the spacer in place by driving a screw through the hole in the centre of the raised section and into the timber frame on the other side — don’t worry, the screw won’t damage your insulation.
This will lock the spacer in place, securing your insulation and ensuring the air gap needed to provide the very best performance from your SuperFOIL Insulation.
Once you’re done, the end result should look something like this:
And that’s all there is to it!
Just repeat that process to set all of your spacers in place, taking care to keep the appropriate spacing, and your insulation will be securely installed in no time at all.
And if you were wondering were you could get your hands on some SuperFOIL Spacers of your own, then we’re happy to say that they’re readily available online — from Amazon, eBay, and plenty of other marketplaces too!
See for yourself…
Want to See More Like This?
If you’ve enjoyed this post and you’d like to see more like it, then filling out the form below is the best way to make sure that you’re the first to hear when we publish new blog posts like these.
But you don’t have to wait around for our next post either, we’ve published plenty of content over the years, and it’s all available to read on our website.
So, if you’d like to find out more about multifoil, the insulation industry, and SuperFOIL in general, then head on over to our news page to do exactly that.