External Wall Insulation in 3 Simple Steps
Published: February 10, 2025
Published: February 10, 2025
Good insulation is a beautiful thing. It makes your home more comfortable, reduces your energy bills, and even protects your home against potentially major issues like condensation.
The issue is that good insulation can be difficult to get right if you don’t know what you’re doing, and a total nightmare to learn about. We’re doing what we can to fix that last part, which is why we’ve put this post together.
So, if you’d like to sort out some external wall insulation for your home, then all you need to do is follow these 3 simple steps…
Knowing is half the battle; that’s as true of insulation as it is of anything else in life.
So, if you want to get the most out of your external wall insulation, then it is essential to make sure you take the time to make a solid plan; one that outlines all the steps you need to take to get everything that you want out of your insulation.
And to help you do exactly that, let’s take a quick look at the most important elements of your plan and how to get them right!
First things first, you should take a moment to figure out what you (ideally) want to get from your external wall insulation.
“To insulate my wall.” I pretend to hear you say.
And, sure, that’s a fair point. But it’s also missing the point of the question. You see, insulating your wall is the end point, it’s the one thing you can guarantee will have happened by the time you’re done with your project.
What you need to think about is everything else you’re hoping for, but it’s not the easiest mindset to get into on the fly, so let’s help you out a bit and list a few examples…
This is the sort of thing we’re talking about. Optional goals that you want but aren’t essential. It’s helpful to figure these things out now, because then you can keep them in mind throughout the whole process.
So, when you have a few minutes to spare, start a “wishlist” for the project. Write a few of your “I wants” down, and keep going as long as things spring to mind.
Then — and this is the important part — keep thinking about it!
Nine times out of ten, you’re going to think of things to add to that list over the next few days, so keep it nearby; maybe on your phone, or in your bag. And, whenever you think of something to add to it, write it down.
After a few days, you’ll probably have a longer list than you’d expect, and you’ll be ready for the last part of this process.
“What’s the last part of the process?” I pretend to hear again, as though hearing voices was something to brag about.
Well, I’ll tell you: you need to read through your list again.
“Why?”
Well that’s the important part. Because, as you read each “I want” on your list, you need to ask yourself a simple question: “Is this a deal-breaker for me?” Every time your answer is “Yes”, add a little mark to that point on your list.
Once you’re done, you’ll have a little list covering everything that you’d like to get out of this project; and, even better, you’ll have a list of everything that you’re unwilling to go without.
Next up, if you want to make a proper plan then you need to know what you’re working with. So, grab a tape measure and a notebook because, then head outside because you’re going to need to take a look at your wall.
“Why?”
Well, there are very few things more relevant to your external wall insulation project than the wall that you’re planning to insulate.
So, to make the most out of the project, there are a few things you need to learn about the wall you’re planning to work with. Such as:

Each of these points should come in handy during the insulation process; from planning out the materials you need, all the way to the installation itself. For now, though, you can pop them to one side while you continue working on what you need for your plan.
There are certain things that you are specifically required to do when undertaking a project like this. The vast majority of these requirements are set out by UK Building Regulations, but regardless of where they’re specified, you NEED to be sure that you are taking every legal requirement into account in your project.
So, how do you do that?
That’s simple, you have to do your research. No matter how you approach it — whether you poke around online, visit your local library, or ask an architect friend — there’s no getting around the fact that it’s going to take a bit of research for you to learn the requirements of your project.
And hey, we get it, looking into this sort of thing can be a complicated, boring chore. So, to help make it a little easier for you, we took the liberty of starting the list for you…
Here’s our list of the fundamental things you will absolutely HAVE to do when you’re insulating your external wall:
BUT, DON’T FORGET: every insulation project is different, and you absolutely still need to do your own research. We can’t guarantee that this list will cover everything you need to do, so do yourself a favour and take the time to check your requirements yourself too!
Finally, you should take everything you’ve just learned — from what you want to achieve to what’s legally required of you — and collect it all into a single, comprehensive plan.
This doesn’t have to be a big, fancy document. In fact, your plan can be as simple as a checklist. The important thing is that it covers everything that you need to do in the order that you need to do it. The point is to leave you with a step by step process that you can just follow through, not something with caveats that you need to remember.
So, whether your plan is to a beautiful multi-page document or a single checklist written on a napkin, make sure each step follows on from the last one. That way, you’ll be far better equipped to get everything you want to get out of insulating your wall.
And, speaking of being well equipped, that brings us to the next thing you’ll need to do for your external wall insulation project; as you can probably guess from the heading above, that’s collecting what you need for the project. Which raises a simple question.
What do you actually need for good external wall insulation?
As you well know, the answer will vary from project to project, but let’s get you started with a quick rundown of what you will generally need for an external wall insulation project:
This is, of course, far from a universal list. In fact, depending on your project, it may not even be a complete one.
But here’s the thing, given that the vast majority of the items on that list are dependent on the kind of insulation you’re using, you’re generally going to have to start by deciding on the insulation solution you want to use.
Fortunately, there are plenty of options available to you…
Unfortunately, that also means you have to decide on a single solution out of a huge range of possibilities; and that’s never easy.
So, in the interest of making your choice just a little bit easier, we’ve taken the liberty of putting together a quick list of some of the most popular insulation options available to you. Along with a quick description of each option available…
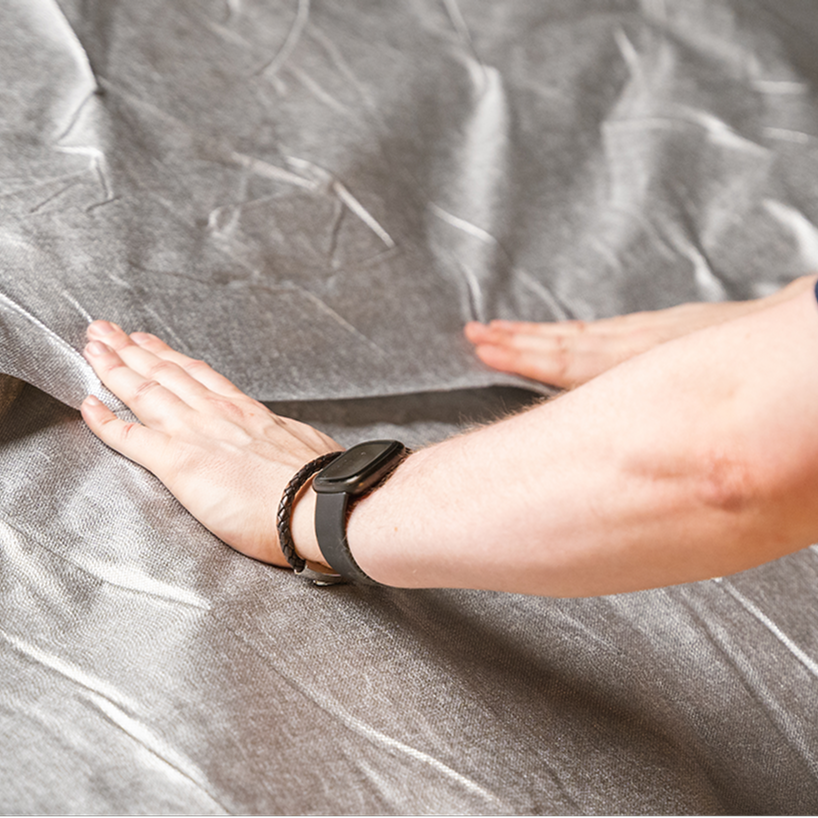
Multifoil Insulation:
Flexible, high-quality insulation for practically any application. Multifoil is a modern solution designed to provide far more value in far less space, and does so in a lightweight, easy-to-install package. Given it’s relatively niche usage, it can be hard to find a reliable installer for these products.
Rigid Foam Board Insulation:
Dense insulation option that comes in panels, offering high-performance. The precision required to provide these results makes it somewhat difficult to work with. There are many kinds available, from PIR to EPS. Few products can match the performance provided by these boards, particularly when they are professionally installed.
Fibreglass Insulation:
Cost-effective insulation made from fine glass fibers. Available in various forms (batts, rolls, and loose-fill) fibreglass is simple to install and provides solid thermal resistance, although it is dangerous to breathe these fibres meaning it requires safety equipment to install.
Mineral Wool Insulation:
Mineral wool provides good thermal protection, alongside solid fire-resistance and even soundproofing qualities. It comes in batts, rolls, or loose-fill, and is generally seen as simple to install, although it’s weight can make it time-consuming to move; particularly for loft insulation.
Spray Foam Insulation:
Expanding polyurethane foam that seals gaps and can provide excellent insulation when properly installed. Despite being a solid product, homes insulated with spray foam have been having mortgaging issues in recent years, due to the difficulty in assessing the structural integrity of lofts insulated with the product.
Cellulose Insulation:
A sustainable option made from recycled paper products. Usually installed as loose-fill or blown-in insulation, meaning it will have to be installed by professionals. Cellulose settles over time, meaning it’s performance may change with time, or even require topping-up.
Alternatively, if you’d like some no strings attached guidance on the best insulation options for your project, you are more than welcome to book a free discovery session to get insights and opinions from our expert technical team.
Once you’ve settled on your choice of insulation, you’re going to need to figure out where you’re going to get it from.
The good news is that companies really want to sell their products, which means you can pretty easily find someone willing to take your money and give you the insulation you’ve chosen.
The bad news is that, since you have so many options, it’s really hard to know if you’re getting a good deal on what you get — let alone the best.
Of course, that doesn’t mean you can’t find the best deal, it just means that you’re going to have to spend quite a bit of time asking for quotes, and then comparing your options.
If you’re planning to use SuperFOIL, then we’ve got a couple of tools to make this process easier for you. Our “Where to Buy” page will help you find retailers near you who sell our products, and if you’re looking to get the best price possible our Quote Request Form lets us handle the busywork of requesting quotes for you.
That being said, if you’ve decided to use insulation other than SuperFOIL, there may very well be similar tools available to you online. So don’t forget to look and see if you can save yourself some time and effort!
So, now that you’ve got your materials together and a plan to follow, the only thing left to do is to actually install your insulation.
Of course, the best way to do this is going to heavily depend on the insulation you’re using and how you’ve decided to install it.
And this is why it is always in your best interest to follow the guidance of your insulation manufacturer when installing their products, if you want to get the most out of those products.
The form this guidance will take will vary from manufacturer to manufacturer, but we would recommend looking for an installation guide — like our own External Wall Insulation Guide.
If you can’t find an insulation guide like this, then your next step should absolutely be to get in touch with the manufacturer of your chosen insulation and request their guidance and advice.
Of course, even if we can’t provide you with specific guidance for your installation process, that doesn’t mean that we can’t tell you — in broad strokes — what the installation process is likely to include; which is why we’ve gone ahead and done exactly that…
First things first, you’ll need to make sure that your external wall is ready to be insulated. Depending on the insulation that you’re working with, this could include any number of preparation steps, but there are a few that are always going to be a good idea. For example:
Repair Any Obvious Damage: You obviously don’t want to seal this kind of damage in with your insulation, so take care to identify and resolve any issues with your wall first and foremost. After all, a strong foundation is essential if you want your insulation improvements to last.
Address Any Moisture Issues: Damp can cause far more issues than you’d believe when it gets caught inside your insulation envelope. So make sure your wall is nice and dry before you install your insulation, and if you have any kind of recurring damp issues, then make sure they’re resolved before you install your insulation.
Clean the Wall: This is generally a nice step to take for a number of reasons, but it is absolutely essential if you have noticed any kind of mould or other fungal growth on the wall you are planning to insulate. After all, you do not want to trap mould, or anything like it, within your insulation envelope.
Once these steps (and any others that your specific insulation may need) are taken care of, you can go ahead and turn your attention toward your insulation.
If you want to make your life a little easier during the actual installation process, then it is always a good idea to take a little time to prepare your insulation materials.
There are a few ways to do this, but some of the most common are as follows:
Cut Your Insulation to Size: This step isn’t as important as it would be in an internal insulation job, such as a loft installation, but it’s still helpful. After all, you don’t want to mess around measuring and cutting your insulation in-situ when you could have pre-cut it to the right size ahead of time.
Mark Your Fixing Points: Another quality of life step, this makes it much easier to secure your insulation properly without fussing with your tape measure. Plus, if your insulation is difficult to fix, then you’ll want every advantage to make the job easier.
Mark Your Connection Points: Whether you are marking the overlaps on your multifoil or the points where your insulation boards need to line up with one another, marking connection points on your insulation is an effective way for you to make sure that you don’t leave gaps in your final insulation build up.
As you may have noticed, these are pretty much all optional steps to take. Even if they are very helpful. This next part, however, is far from optional…
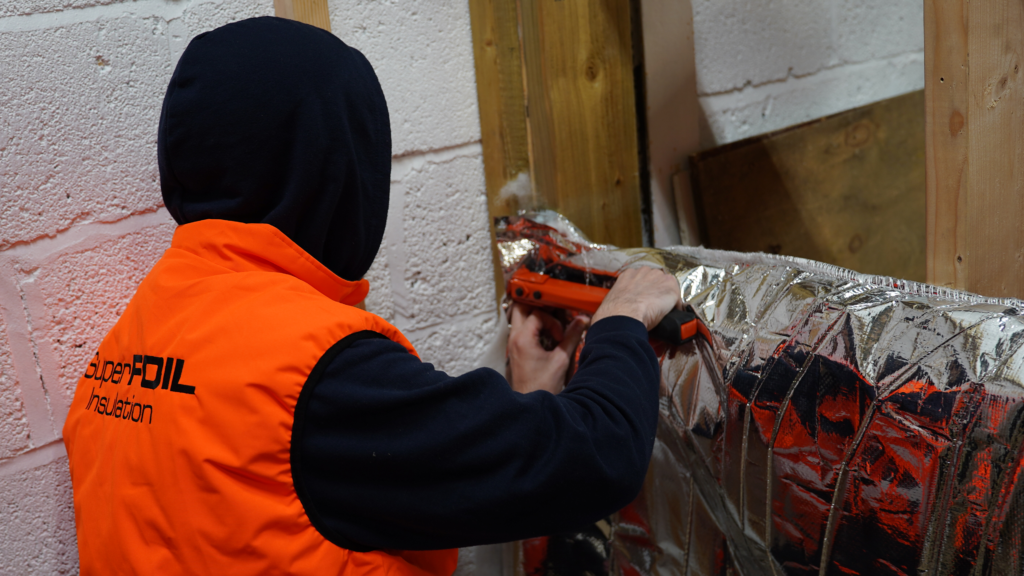
The moment has finally come, with your wall prepared and your insulation prepared, it’s time to finally do the deed itself.
Of course, this is the part of the process that we’re going to have the least to say about, but we’ll cover the basic steps so you know whether or not you’re hitting them. So, in any insulation job you’ll want to:
Position Your Insulation: For insulation to do its job properly, you need to make sure it provides as much coverage as possible. Leaving gaps in your insulation is a great way to ruin the benefits it provides, and could actually cause more problems in the long run. All of which is why it is so important that you properly position your insulation before installation.
Fix Your Insulation in Place: Once your insulation is in place, you need to make sure it stays there. That’s what fixings are for. And, since you want your insulation to stay secure for years to come, you need to make sure that you’re using the right fixings for your insulation. After all, the last thing you want is for your fixings to fail years down the line, without your knowledge.
Apply Your Sealant: This is one of the last steps to any insulation project, but it’s important. Why? Because your sealant is the tool you use to reinforce BOTH of the previous steps. Quality sealant is invaluable for strengthening the fixing of your insulation, but also to help ensure that you securely close any openings that you find in your insulation build-up.
Once you’ve done all of this, and any further steps your insulation may require, then you’re very nearly done with the insulation process, but there is one more thing that you will need to take care of.
You may have noticed that you don’t see many houses with their insulation on show. That’s thanks to finishing materials, which help to finalise the installation and provide primary rain & fire barriers to any project.
At this point, you should have already selected a finishing material for your project. So, once you’ve completed the installation of your chosen insulation, you can finish it all off by applying your finishing material — according to the installation guidance provided by the manufacturer of your chosen finishing material.
And that’s it! Hopefully this post has helped you get to grips with external wall insulation and what it takes to get the most out of your project.
As we mentioned earlier, we’ve made it a part of our mission to make it easier to learn about insulation; no matter who you are.
So, if you’d like to help us with that, and you have questions about insulation that you’d like answered, then you can send them to us by leaving a comment below!
Whether you want to let us know what you think about this post, or want to reach out for some advice, leaving a comment is a great way to let us know what you’re thinking.